A dishwasher is essentially a robot for your kitchen. It doesn’t think. It doesn’t care about your leftovers. But it does follow instructions. You load the plates. You add the soap. You press start. Then it handles the rest.
It performs a loop of tasks that would be tedious to do by hand. It adds water. It heats that water to a specific temperature. At the right moment, it opens the detergent compartment. Then it blasts the dishes with pressurized water. It drains the dirty sludge. It rinses with fresh water. It drains again. If you picked the dry setting, it heats the air to evaporate the moisture.
This isn’t magic. It’s mechanical precision.
The Self-Monitoring System
Modern dishwashers watch themselves. They don’t just run blindly. A timer or a small computer tracks the cycle length. Sensors check the water and air temperature. These sensors prevent overheating. They protect your plastic containers from melting and your hands from burns if you open the door mid-cycle.
Another sensor monitors the water level. If it gets too high, the drain activates automatically. This prevents a flood in your cabinet. Some advanced models even detect dirt levels. They analyze the water coming off the plates. When the water runs clear, the cycle ends. The dishes are clean. The machine knows it.
The Mechanics of Spray and Heat
Dishwashers are watertight, but they don’t fill up like a bathtub. Only a small basin at the bottom holds water. That’s where the heating elements work. They can push water up to 155 degrees Fahrenheit (68 Celsius). That’s hot enough to kill bacteria and melt grease.
A pump takes this hot, soapy water and forces it up to the spray arms. The design relies on physics. Think of a garden hose. If you put your thumb over the end, the stream gets forceful. The dishwasher jets work the same way. The pressure spins the spray arms. They rotate just like a lawn sprinkler.
This force dislodges food particles. The particles don’t just vanish. They get caught in a filter. Or they get chopped up. The process mimics a garbage disposal. The water drips back down to the basin. The cycle repeats. It happens multiple times per load.
Drainage and Drying
Once the wash and rinse phases are done, the water drains. The pump pushes it out of the unit. Where does it go? Usually, it flows into the pipes under your sink. Or it dumps into your garbage disposal unit. This depends on your home’s plumbing setup.
The final step is optional. The dry cycle. The heating element at the bottom warms the air inside the tub. This helps the dishes dry. You can skip this. Many people just let the door crack open. The air dries them naturally. This saves energy.
Dishwashers aren’t mechanically complex. They rely on simple principles. Heat. Pressure. Flow. Drainage.
In the next section, we will break down the main parts of a basic dishwasher. You’ll see exactly what makes the spinning arms turn. You’ll learn where the filter sits. You’ll understand how the door latch holds everything together.
Understanding these basics helps you troubleshoot. It helps you maintain the machine. It helps you get cleaner plates with less effort.
Dishwasher Basics
Inside the Door: How It Actually Works
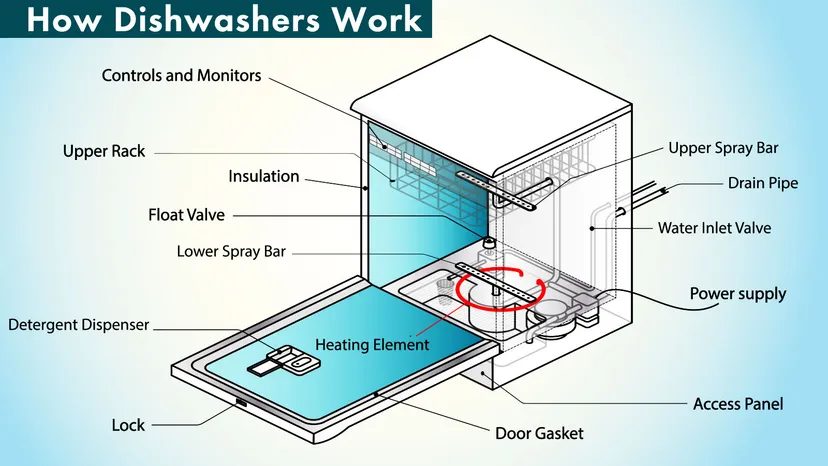
The guts of a dishwasher are tucked behind that control panel on the door. If you’re dealing with an older or budget model, you’re looking at a simple electro-mechanical timer. It’s a mechanical clock that dictates timing. It opens the detergent dispenser. It fires up the wash spray. It triggers the drain. All on a set schedule.
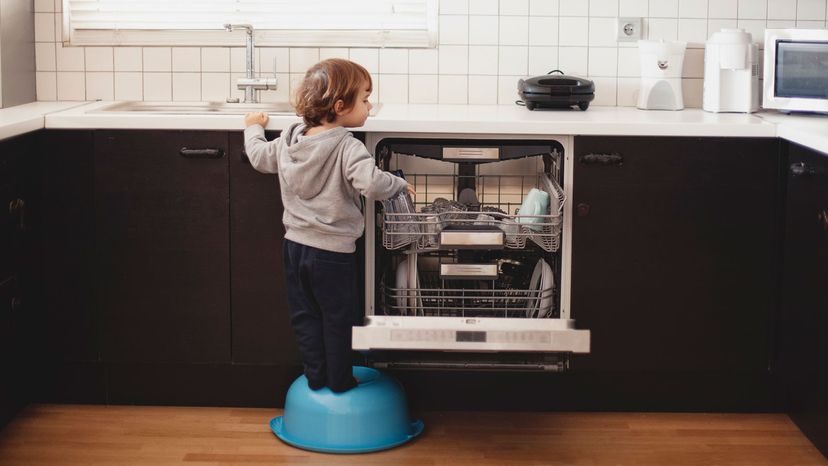
Newer, pricier units swap the clock for a computerized brain. More sensors. More precision. But the basics remain. You won’t get a cycle started unless the door latches tight. Most modern machines have a safety switch that cuts power if the latch isn’t engaged. Some have child locks too. A small toggle on the panel prevents little hands from starting a wash during nap time.
The Water Intake Valve
Water enters through the intake valve. It’s mounted on the inside of the tub. Think of it as a gatekeeper. It opens only when the machine calls for water. Closed otherwise. Home water pressure pushes the liquid in once the valve releases.
If the valve sticks open, your floor becomes a swimming pool. If it stays closed, you get a spinning, empty rack. It’s a simple component. But it’s critical for getting the right volume of water into the basin.
The Circulation Pump: Muscle and Flow
An electric motor drives the circulation pump. This is where the cleaning action happens. During the wash phase, the pump forces hot water up into the spray arms. The arms spin. The jets blast the dishes.
When the cycle hits the drain phase, the pump reroutes the water. It pushes it into the drain hose. The pump assembly sits beneath the basin. Usually right in the center of the bottom of the dishwasher.
There are two main designs you’ll encounter.
-
Reversible pumps. The motor spins one way to push water to the spray arms. It spins the other way to push water to the drain. They’re usually mounted vertically. Simpler design. Fewer moving parts in the flow path.
-
Direct-drive pumps. The motor only runs in one direction. To change the flow, a solenoid valve redirects the water. This valve switches between the spray arm path and the drain pipe. These are typically mounted horizontally.
Both systems get the job done. The difference is in the engineering and the noise profile. Reversible pumps can be louder. Direct-drive systems often run smoother.
Installation: Portable vs. Permanent
You can install a dishwasher in two distinct ways. Portable or permanent.
Portable units have finished sides. A finished top too. They double as a countertop when not in use. The unit sits next to a wall. When it’s time to wash, you roll it on casters over to the sink. You connect the hose to the faucet adapter. You plug it into a nearby outlet. It’s flexible. But it’s not as seamless.
Permanent installation is the standard. The dishwasher slides under the counter. It bolts into the cabinetry. Hoses connect directly underneath the sink. The hot water line feeds the intake valve. The drain line connects to the garbage disposal or the drain pipe. The unit plugs into a dedicated outlet under the sink.
Both setups require a 120-volt grounded line. Don’t skip the grounding. Safety first.
A Quick History Lesson
Who came up with this? Early attempts were crude. A dish rack on a spindle. A basin of water below. You turned a hand crank. The rack rotated. The dishes splashed in the water. It was inefficient. It was manual labor with extra steps.
Josephine Cochrane changed the game in 1886. She was a wealthy socialite. Her servants kept chipping her fine china while hand-washing. She got tired of the breakage. She developed a rack and water jet system. It debuted at the 1893 Chicago World’s Fair. Her company eventually became KitchenAid.
The principle is still the same. Hot water. Detergent. Pressure. Just automated now.
Using a Dishwasher
Now that you know what’s happening inside the box, let’s talk about using it.
Most people treat the machine like a magic box. They throw in the tray, hit start, and walk away. But if you want clean plates without the gritty residue or the clouded glass, you have to meet the machine halfway. It does the heavy lifting, but you set the stage. Get this wrong, and you are just wasting water and electricity.
The Loading Logic
Start with what not to do. The biggest sin? Regular dish soap. Hand-washing liquid creates suds. Way too many suds. They will overflow your tub and make a mess you do not want to clean up. Only use products labeled for machines.
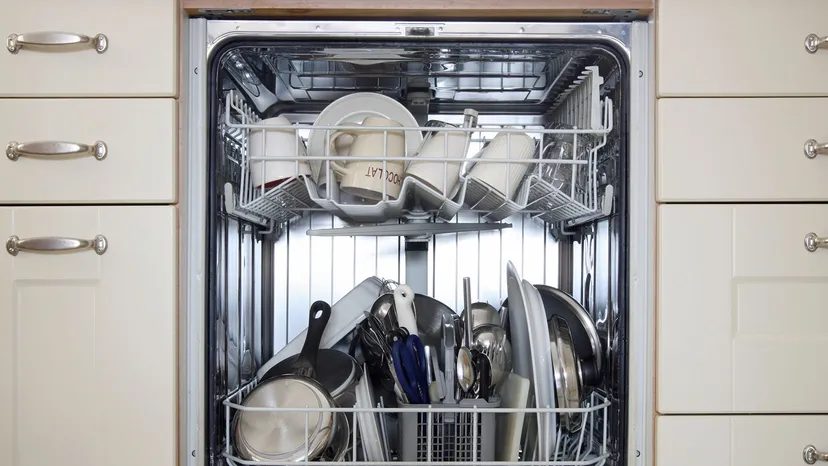
Then, look at how you stack the rack. Do not overload it. The water jets need room to move. If the dishes are jammed tight, the spray hits a plate and bounces off rather than cutting through the grease. Face the dirtiest parts toward the center spray arm. That is usually where the pressure is strongest.
Shape matters more than you think. Do not nest identical bowls or spoons together. They lock like magnets. Water cannot reach the insides, and you end up with soapy pockets inside your salad bowl. Separate them.
Metal hygiene is another trap. Never put stainless steel and sterling silver (or silver plate) in the same load. In the humid, warm environment of a wash cycle, different metals can react. You get corrosion or pitting almost instantly. It looks ugly. It is permanent.
The Heat and Material Trap
Plastics belong on the top rack. Always. The bottom rack is closer to the heating element. If you use the high-heat dry cycle, those bottom plastics will warp or melt. Stick to glass, ceramic, and metal on the bottom.
Some items simply do not belong in the machine. Wood warps and cracks. Cast iron loses its seasoning. Fine china, crystal, and hand-painted dishes can fade or crack under thermal shock. Wash those by hand. It takes longer, but your heirlooms will last longer too.
Pre-Cleaning and Water Pressure
Here is a counter-intuitive tip: do not pre-clean your dishes. Scrape off the large chunks of food into the trash, sure. But leave the film. Dishwasher detergents are formulated to bind with food particles to maintain the right pH balance inside the tub. If the dishes are too clean, the detergent has nothing to react with, and it can actually corrode the machine’s interior components over time.
Timing also helps. Run the dishwasher when water pressure is highest. Late at night is usually best. Everyone else is asleep. You are not competing with a shower or a washing machine. The pumps work harder, the spray is stronger, and the rinse is cleaner.
If you have hard water, bump up the detergent amount slightly. The minerals in hard water fight your cleaning agents. A little extra helps win the battle. And if you want spot-free drying, use a rinse aid. It lowers the surface tension of the water, letting it sheet off your plates instead of beading up and leaving mineral spots.
Choosing the Right Detergent
Not all detergents are created equal. The chemistry matters. You need a formula that counters mineral deposits (hardness). It needs solvents to dissolve fats, abrasives to scour off stuck-on starch, and surfactants to keep the dirt suspended in the water so it can be drained away.
Which form is best? Tablets, powders, or gels? Research does not show one cleaning significantly better than the others. It comes down to your preference and your local water hardness.
However, freshness is non-negotiable. Check the date. If the detergent is older than two months, it degrades. The enzymes lose potency. The cleaning power drops. You will end up with dirty dishes and a wasted cycle. Buy small batches if you do not run the machine every day.
Fixing Common Malfunctions
The most common complaint is dirty dishes after a full cycle. Why? Usually, it is a water pressure issue or clogged jets.
If your water jets are blocked by mineral build-up, the water cannot reach the center of the rack. You can fix this yourself. Take a wire or a pin and clear out each jet opening. Do this regularly if you have hard water.
Once a month, run an empty load with vinegar in the detergent dispenser. It helps dissolve the internal scale that accumulates over time. It is a cheap maintenance step that extends the life of your pump and spray arms.
Drain issues are trickier. If water is left at the bottom of the tub, it could be a clog in the drain hose or a failing pump. Or, it might be a sensor error. If the water gets too sudsy—often from using too much detergent—the machine’s sensors might mistake the foam for water. The sensor thinks the tub is full. It shuts off the drain cycle to prevent flooding. The result? Dirty water sits there.
The fix is simple. Use less detergent. If you see suds, you are using too much. The machine needs clear water to function correctly.
The Buyer’s Guide
If you are replacing an old unit, the market is crowded. You are looking for efficiency, noise levels, and drying technology.
Noise Levels
Look for the decibel rating. 44 dB or lower is considered quiet. If
Size
You aren’t buying a dishwasher. You are buying a hole in your cabinetry that fits a machine. Standard models are 24 inches wide. That’s the number you need to memorize. Compact units sit at 18 inches. They are for tiny kitchens or second homes. If you have a family, or just like hosting dinner parties, the 18-inch model will drive you crazy. You will load it. You will cry. You will load it again. Stick to 24 inches unless you have a compelling reason not to.
Measure the opening. Not the appliance. The space in your cabinets. There must be room for water lines and electrical hooks. Leave a few inches of clearance. You need to pull the door open without hitting the counter. You need to slide the racks in and out without jamming them.
If the door hits the counter, you can’t load the bottom rack properly.
Check the height too. Most standard dishwashers are 34.5 inches tall. Countertops vary. You might need a trim kit to make it look flush. You might need to shave the cabinet frame. Do this before you buy. Or you will be returning the dishwasher.
Depth matters as much as width. A deep dishwasher might stick out past your counters. That looks bad. It’s a tripping hazard. It also blocks access to the pipes underneath. Measure the depth of your existing dishwasher. Buy a new one with similar dimensions. If you are replacing an older model, the new one might be deeper. Check the specs.
Features
Ignore the noise rating if you live in an apartment. Or listen to it. Lower decibels mean a quieter machine. 44 dB is standard. 40 dB is quiet. 38 dB is library-silent. If your kitchen is open to the living room, go for the quietest one you can afford. Otherwise, the difference is negligible.
Look at the racks. Adjustable tines are nice. Fold-down cups racks are better. They give you space for large pots. Some models have a third rack in the top. It holds utensils. Or small bowls. It’s a space-saver. But check the clearance. You need to pull the bottom rack out fully. If the third rack is too low, you can’t.
Heating elements vary. Some use a metal loop. Some use a fan. Fan-assisted drying is faster. It uses less energy. It also leaves dishes drier. Plastic items still might not dry well. That’s a physics problem. Not a design flaw.
Delay start is a basic feature. All good models have it. Use it to run the machine during off-peak hours. Save money. Save energy. Simple as that.
Installation
You can install a dishwasher yourself. It’s not hard. But it’s not easy either. You need to shut off the water. You need to disconnect the old unit. You need to connect the new one. Water line. Drain hose. Electrical cord. Or hardwire it. Check your local codes. Some places require a licensed electrician. Or plumber. Do your homework.
Turn off the breaker. Pull the old dishwasher out. It’s heavy. Get help. Disconnect the lines. Cap them if you are keeping the old unit. Connect the new lines. Slide the new unit in.

Size is the first hurdle. You aren’t locked into the standard 24-inch (61-centimeter) width, though that’s what most kitchens expect. If you have a tiny apartment or a studio, look at 18-inch (46-centimeter) “apartment-sized” units. They fit narrower cabinetry. For massive families or frequent entertainers, 30-inch (76-centimeter) models exist, but anything beyond that crosses into commercial territory.
Then there are the outliers. Countertop and in-sink dishwashers handle up to six place settings. Countertop models sit on the counter—no installation required. In-sink units replace half of a double sink basin. They wash a load in about 20 minutes. When not in use, a cover turns the unit back into prep space.
The Dish Drawer Alternative
Consider a dish drawer if space is tight. These look like large kitchen drawers. They use less water and energy than full-sized machines. Perfect for small kitchens where a swinging door would block traffic flow. You can buy them as singles or doubles. Double-drawer models hold as many dishes as a standard dishwasher. The drawers operate independently. Run one for a small load. Save water. Run both when the house is full.
Basins and Racks Explained
Check the basin material before you buy. Lower-end models use plastic. Mid-range and high-end models use stainless steel. Plastic basins are fine, but stainless steel is more durable.
Filters matter. Cheaper models have manual filters. Food bits settle in there. You must clean them regularly. Expensive models feature self-cleaning filters. Some even include small grinders that pulverize large food chunks so they drain away with the dirty water.
Racks vary wildly. The more you spend, the more adjustable the racks become. Look for:
– Collapsible tines
– Folding racks
– Extra shelves
– Removable upper racks
If you wash large platters or oddly shaped pots, take them to the store. Test them in the rack. Don’t assume they will fit.
Smart Features and Noise
Smart home integration is no longer a luxury. It’s standard. Most dishwashers now include soil sensors. The machine senses how dirty the dishes are. It adjusts the wash time and water amount accordingly. This saves energy and water. Half-load and speed-wash cycles are also common energy-savers.
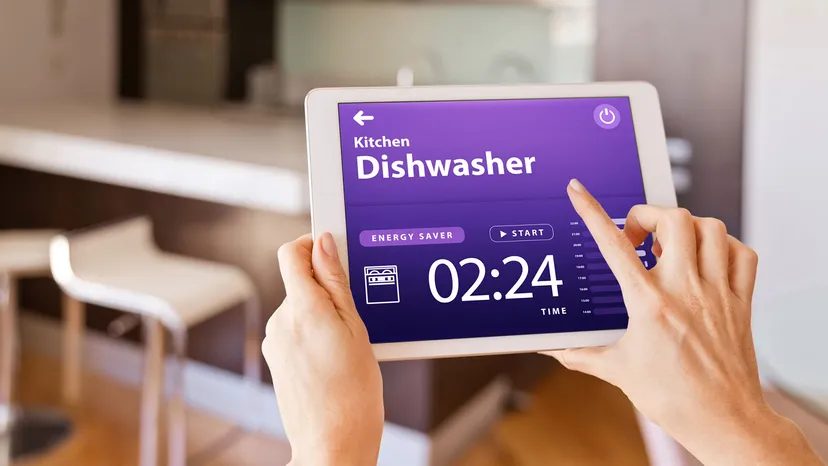
High-end models offer WiFi connectivity. Control your appliance from a smartphone. Start cycles remotely. Check remaining time. Lock buttons to keep kids from messing with settings. Get alerts if rinse aid is low. Receive notifications if a leak is detected. Program the machine to run only when local energy consumption is low. This can lower your bill.
Other newer features include:
– A slim third rack for large, flat items
– Bottle jets for baby bottles and water bottles
– Racks that move both up and down
Noise is a real concern. If your kitchen opens into the living room, invest in noise suppression. Expensive units have heavy insulation. Note that models with food grinders are louder than those without them.
Energy Use and Cost
Look for the Energy Star label. The U.S. government’s Energy Star program lists the most efficient models each year. It helps you pick a machine that is good for the environment and your wallet.
How much will this cost? In 2021, a reliable model cost less than $600. Spend $1,000, and you get a third rack, quieter operation, and a powerful food disposal. Prices go up to $2,000 and more for every feature imaginable. Think WiFi, hidden controls, LED lights, built-in water softeners, and water cleanliness sensors.
Government regulations have boosted efficiency. Unless your dishwasher is a pre-1990 relic, it’s probably efficient. ENERGY STAR certified dishwashers are 12 percent more energy-efficient and 30 percent more water-efficient than standard models, according to the Environmental Protection Agency. A standard-size ENERGY STAR certified dishwasher costs about $35 annually to run. It saves about 3,870 gallons (17,593 liters) of water over its lifetime.
Using a dishwasher saves time. It also saves energy and water compared to hand washing. An Energy Star dishwasher saves an amazing 7,000 gallons (26,500 liters) of water annually compared to hand washing. It gives you an extra 230 hours of time. It shaves $111 off your utility bills.
Commercial Dishwashers
Restaurant machines work the same way as home units. But they are built differently. They must withstand constant, repeated use. They are heavy duty. They wash an entire rack of glasses and plates in minutes.
Sterilization is the key difference. Home temperatures are not high enough to sterilize dishes completely. The U.S. Food and Drug Administration requires commercial units to maintain a temperature of at least 160 degrees Fahrenheit (71 Celsius). This level of heat is necessary for public health in a restaurant setting.
Dishwasher FAQ
How do I know if a dishwasher will fit my space?
Measure the width, height, and depth of your existing cabinet opening. Most standard units are 24 inches wide, 34 inches high, and 24 inches deep. Account for countertop overhang and kickplate clearance.
What is the difference between a dishwasher and a disposal?
A disposal grinds food waste for drain systems. A dishwasher cleans dishes with water and detergent. Some dishwashers have built-in disposals, but they serve different primary functions.
Is it cheaper to run a dishwasher or wash by hand?
It is generally cheaper and more water-efficient to run a modern dishwasher. Hand washing often uses more water and energy, especially if you let the tap run. An Energy Star model saves thousands of gallons per year compared to hand washing.
Do I need to pre-rinse dishes?
Modern dishwashers have soil sensors. They can handle some food residue. Scrape off large chunks. Pre-rinsing is usually unnecessary and wastes water. Check your model’s manual for specific instructions.
Why is my dishwasher making noise?
Check for loose items in the rack. Ensure the spray arms are spinning freely. If the noise is a grinding sound, a foreign object might be stuck in the pump or filter. Clean the filter first. If it persists, the motor or mounting might be damaged.
Energy efficiency is the main driver here. If you run the numbers, dishwashers beat hand-washing on both cost and water usage. They are essential for large families or busy offices. But what if you live alone or with just one other person?
You don’t need a massive unit.
Choosing the right unit capacity
Start with capacity. You want a machine that can handle a full load of dinner plates, pots, and pans without needing a second run. Look for high unit capacity. If space allows, go big.
Check the cycles too. Specialty washes matter. “Rinse and hold” lets you preload dishes throughout the day. “Quick wash” cuts time for lightly soiled items. “Sanitize” kills bacteria. “Delicate” protects glassware.
“Energy usage is just as important as capacity when choosing an appliance.”
Review the energy guide labels. Lower usage means lower bills. It’s a long-term saving that adds up.
Portable dishwasher drainage setup
Portable models offer flexibility. They don’t require permanent installation. But how do they drain?
You need a unicouple. This tool attaches directly to your kitchen faucet. It splits the flow. One hose goes to the dishwasher. The other connects to the sink drain. It’s a simple swap. No plumber required. Just attach, run the cycle, and detach.
Built-in vs portable performance
Do they clean as well as built-ins? For small households, yes. Portable dishwashers can be more efficient for fewer people. You aren’t heating water for empty racks.
However, there are limits. Unit capacity is lower. You can’t fit large baking sheets or stock pots easily. There are clear constraints on what fits inside.
Renters often prefer this option. No permanent changes to the kitchen. Easy to move when you relocate.
Which option works for you?
If you have space, a built-in is more convenient. No daily plumbing swaps. But if you rent or have limited counters, a portable unit saves water and money.
The decision comes down to household size and rental status. Large families need the capacity. Small households benefit from the flexibility.
Consider your daily dish volume. Count the plates. Estimate the load. Then look at the energy ratings.
Portable models aren’t just placeholders. They’re functional. Just not for every household.
You might find that a double drawer model fits better. Or a compact built-in. The market has options for every square footage.
Safety note: Always check the water connection. Leaks under the sink cause damage. Ensure the unicouple is tight. Test it with a quick rinse before loading full dishes.
There’s no single right answer. Just what fits your space and your habits.
Squeezing Out the Last Bits of Detail
You think you’re done? Maybe not yet. The difference between a project that looks like a magazine spread and one that looks like a DIY weekend gone wrong often comes down to the tiny, annoying stuff you want to skip. But skipping is how you end up with wobbly shelves or peeling paint. Let’s dig into the specifics.
The Nitty-Gritty of Materials
It’s not just about buying the right thing. It’s about buying the right version of the thing.
If you’re tiling a backsplash, don’t just grab the first box. Check the batch number. Tiles from different batches can have slight color variations. A subtle shift from warm cream to cool beige will look like a mistake if it’s in the middle of your kitchen island.
Cutting tiles requires patience. A cheap snap cutter works for straight lines. For those tricky L-shapes around outlets? You need a wet saw. Or a manual rotary tool with a diamond blade. Safety gear isn’t optional here. Eye protection. Dust mask. The little shards of ceramic fly faster than you think.
Hardware and Finishes
Knobs and pulls seem small. They aren’t. They dictate the feel of the room.
Check the backset. That’s the distance from the edge of the door to the center of the hole. Standard is 2-3/8 inches or 2-3/4 inches. Measure twice. Drilling a hole in a solid wood door is easy. Fixing a mistake is hard.
For finishes, mix metals if you’re brave. Brushed nickel hardware with chrome faucets? Yes. Just keep it consistent across the zone. Don’t mix brushed nickel with polished brass in the same sink area. It looks confused.
The Finishing Touches
Caulk. Everyone hates it. Everyone ignores it until it’s too late.
Use paintable latex caulk for interior trim. Silicone is for bathrooms and kitchens where water is constant. If you use latex in a shower, it’s going to mold and peel in six months.
Smooth your bead with a damp finger or a caulk tool. Don’t skip this. A ragged bead screams “amateur.” A smooth line screams “professional.”
Troubleshooting Common Mistakes
Did your paint look dull after it dried? You probably didn’t use enough coats. Or the sheen was wrong. Eggshell hides imperfections. Satin shows them. Choose wisely.
Did your tile lippage? That’s when one tile sits higher than the next. Use leveling clips. They cost pennies. They save hours of frustration. And headaches.
Final Checks
Walk through. Turn lights on. Turn them off. Open doors. Close them.
Look for gaps. Look for misalignments. Look for the little things that keep you up at night.
Fix them now. It’s cheaper than fixing them next year.
You’ve got the tools. You’ve got the materials. You’ve got the plan. Now go make it happen. One small step at a time.